How to Give Your Bathroom a Warm, High-End Feel
Why Warmth and Luxury Start With Material Choices
It is all about the materials you select. It doesn’t matter how beautiful your lighting is or how costly your tapware — if your materials are cold and clinical, it doesn’t amount to much.
Natural stone, travertine, limestone, or a stone or travertine-look porcelain is where your journey starts. Porcelain tiles in a stone or travertine look have low porosity, are durable, and don’t require the same care as natural stone. Large-format tiles (e.g., 600×1200mm) minimize the number of grout lines in any space and make it look more expensive. Large format tiles require a very even substrate and expert installation, so factor in this additional cost. It is not a DIY project.
A timber look is an excellent companion to natural stone as it provides that organic warmth. Before you finalize your material choices, it is worth noting that shower-area walls must be waterproofed to a height of not less than 1800mm above the floor substrate, and bath-adjacent walls must be water-resistant to a height of not less than 150mm above the vessel. This may influence which wall materials and substrates you can use. A cabinet wrapped in PVC is waterproof; MDF cabinetry is not — consider this when choosing your bathroom cabinetry.
Once you’ve decided on your materials, the next decision is your lighting. It will dictate how those surfaces read in the space, and poor lighting choices can undermine the best materials in the world.
Lighting That Makes a Bathroom Feel Expensive
Single overhead downlight — I still regularly see this, and it never fails to sadden me a little. It is the quickest way to make a perfectly tiled room look like a service station bathroom.
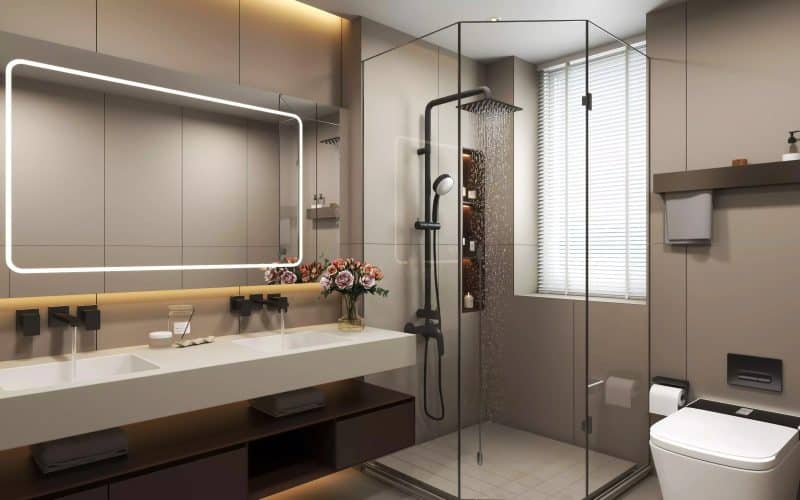
Instead, opt for layered lighting: ambient lighting provides general illumination; task lighting provides illumination around the mirror for applying makeup or shaving; and accent lighting highlights certain materials and surfaces in the room. A warm lighting scheme should feature color temperatures between 2700K and 3000K — any cooler, and you start to lose the warm, golden quality entirely — but beyond aesthetics, there are compliance requirements to keep in mind too. The fittings you select must comply with the IP rating requirements for their electrical zone, and all hardwired fittings — LED mirrors included — must be installed by a licensed electrician. LED mirrors are good value, anti-fog, and dimmable, with a 50,000-hour lifespan, meaning they do a lot of the hard yards for you.
Once your warm lighting scheme has been selected, your wall colors and surfaces need to be compatible with it — the incorrect palette will clash with, not complement, warm lighting.
Color Palettes and Finishes That Add Warmth Without Clutter
Subtle warm neutrals, including sandy beiges, muted terracottas and warm greys, can help pull an entire scheme together without dominating. Opt for a low-sheen or semi-gloss finish, which handles humidity better than flat paint and is easier to wipe down. Grout color — often finalized on the day the tiler arrives — should be carefully considered to enhance, rather than compete with, your tile choice. A warm-toned grout, from ivory and sand to a soft charcoal, looks far more attractive than stark white grout, which is notoriously difficult to maintain and shows every mark. The two strongest warm metallic finishes for tapware right now are brushed brass and brushed nickel, with brushed gold adding a touch of drama in a complementary scheme. Matte black is also a popular and timeless finish. After you have decided on your tiling, flooring, tapware and accessories, you can focus on the vanity.
The Vanity Defines the Overall Mood of the Bathroom
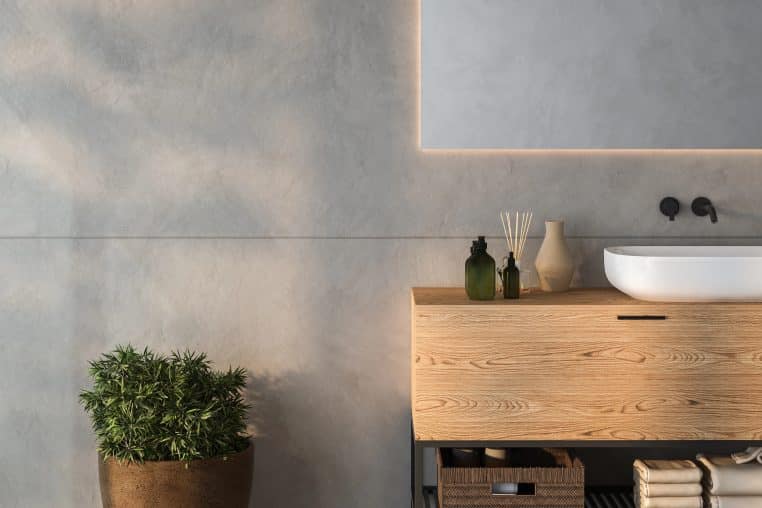
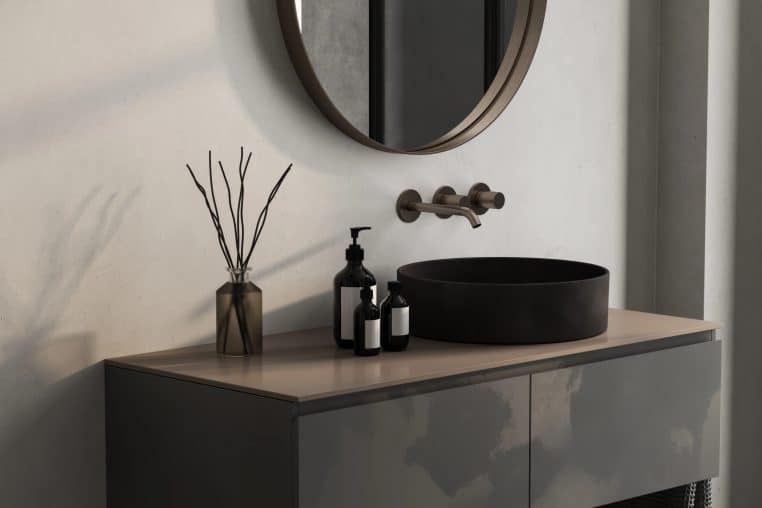
The vanity material will make the biggest difference in the bathroom’s warmth. While a high-gloss white vanity is fine, it simply doesn’t provide warmth. A hardwood bathroom vanity or timber-look vanity, however, can change the overall feel of a room completely — and it is important to understand what makes them different. Solid timber looks beautiful but can be expensive and may suffer from moisture issues if not kept sealed and maintained. PVC-wrapped timber-look vanities are completely waterproof, making them very practical in a wet room and a less expensive option. Timber veneer is less moisture-tolerant than PVC but can work well in a bathroom with good ventilation. Premium plywood-construction vanities are less vulnerable to moisture. Standard vanity widths range from 600mm to 1500mm — a wider vanity makes a stronger visual impact and provides more storage. Made-to-order vanities typically carry a lead time of four to eight weeks, so plan accordingly. A stone benchtop adds warmth and a sense of luxury over laminate. Note that stone and concrete basins are considerably heavier, so confirm the cabinet construction will support the weight.
Finishing Touches That Elevate the Overall Feel
A heated towel rail feels like a genuine luxury once you’ve experienced it — providing not only a warm towel but also reducing dampness in your bathroom and offering some temperature control through winter. A hardwired heated towel rail must be installed with RCD protection by a licensed electrician.
Your mirror is also worth selecting carefully. For a bathroom vanity, the mirror width should sit within 100mm to 150mm of the vanity width on either side to maintain visual balance — too small looks odd and too large disrupts the proportions. While you’re thinking through glass elements, shower screens come with their own non-negotiable requirements. All frameless and partly framed shower screens must be manufactured with toughened glass of minimum thickness 6mm and must carry the marking permanently on the glass. Finally, ensure all accessories throughout the bathroom share a consistent finish — heated towel rail, robe hook, door handles and all. If you’ve chosen brushed nickel, choose brushed nickel throughout; brushed brass should be brushed brass throughout. It is a small detail that completes the look.