
Halloween Costume Photo Tips for Parents: Getting Frame-Worthy Shots of Your Kids
Is there anything cuter than a pint-sized pumpkin or a toddler dragon stomping around the living room? Halloween is one of the best times of year to grab the camera. The trouble is that costume photos usually happen in a mad rush – five minutes before trick-or-treat starts, in a dark front hallway, with a kid who wants candy NOW. And in Wisconsin, you can pretty much count on a chilly night that ends with a winter coat zipped right over that adorable costume.
A little planning goes a long way. And once you have a photo you love, it deserves better than getting lost in a camera roll with thousands of others. Turning a favorite Halloween shot into wall art is a sweet way to bring it back out every October, and comparing the best canvas prints can help you choose a size and style that suit both the photo and your space. But first, you need the photo! Here are some tips for getting frame-worthy shots of your trick-or-treaters.
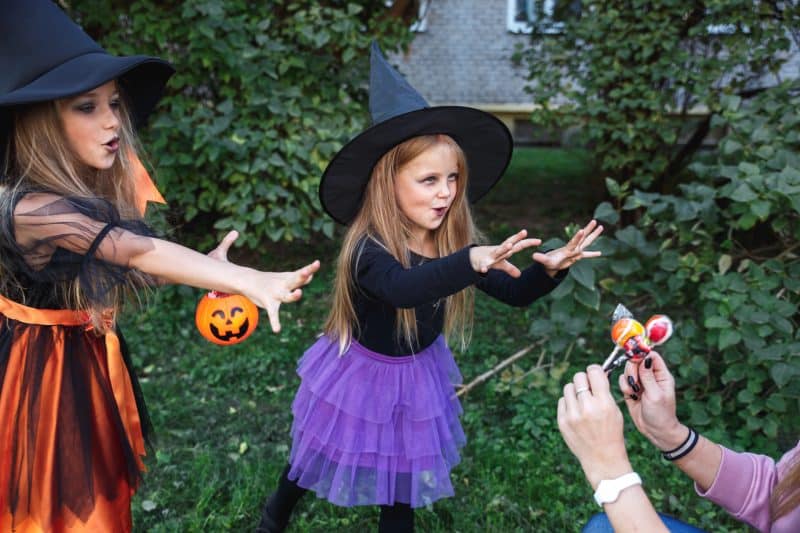
9 Tips for Frame-Worthy Halloween Costume Photos
1. Do a costume “dress rehearsal”
You don’t have to wait until October 31st! Pick a calm afternoon a day or two before Halloween, when everyone is fed, rested and nowhere near the candy bowl. It also gives you a chance to make sure the costume actually fits and stays put. If a headband keeps sliding or a cape keeps tripping them, better to find out now than halfway down the block.
2. Beat the sunset
The sun sets early at the end of October, so plan your photos for late afternoon. The hour or so before sunset gives you that soft, warm glow that looks amazing with fall colors. Once it gets dark, phone cameras tend to struggle and you end up with grainy or blurry pictures. If you’re shooting indoors during the day, place your child near a big window instead of using the flash.
3. Look for open shade
Bright midday sun makes kids squint and leaves harsh shadows on their faces. Open shade is your best friend – think a covered porch or the shady side of the house. If you use a tree, check that your child’s whole face is evenly shaded, since sunlight peeking through the leaves can leave blotchy spots. Even shade is flattering, and nobody ends up with raccoon eyes (unless they’re dressed as a raccoon, of course!).
4. Keep the background simple
A pile of pumpkins, a bright maple tree or your front door with a fall wreath makes a perfect backdrop. Before you start snapping, take a minute to move the garbage cans, the hose and the kids’ bikes out of the frame. If the front porch is your photo spot, it’s the perfect time to tackle a few of these things to do to get your house ready for trick-or-treat while you’re at it.
5. Choose camera-friendly (and kid-friendly) costume pieces
Masks might look cool, but they hide that sweet face you’re trying to capture! The American Academy of Pediatrics suggests non-toxic face paint and makeup as an alternative to masks, since masks can limit a child’s vision. It also recommends bright, reflective costumes so kids are easier to see after dark. Test any new makeup on a small patch of skin a few days ahead so there are no surprises. And if it’s cold out, take coat-free photos indoors before everyone bundles up for trick-or-treat.
6. Get down on their level
Most of us take pictures from standing height, which means we’re looking down on the tops of little heads. Kneel or crouch so the camera is at your child’s eye level. It feels more personal and puts the focus right on them. For a fun twist with superheroes or monsters, try shooting from a bit lower and looking up so they look larger than life.
7. Let them play the character
“Say cheese” usually gets you a forced grin. Instead, ask them to show you their scariest monster roar, their best witch cackle or how a superhero lands after flying. Some of the best photos come from the moment right after the pose, when the giggles start. Keep shooting!
8. Don’t forget the details
Some of the most precious photos aren’t of the whole costume at all. Get close-ups of tiny hands holding the candy bucket, little feet in dinosaur slippers or the cardboard sword your kiddo helped make. These detail shots look great grouped together in a collage later on.
Whatever you’re shooting, leave a little space around hats, wings and faces. If you plan to print on canvas with a folded edge, the outer margins of the photo wrap around the sides of the frame, so anything too close to the edge can end up on the side instead of the front.
9. Use your phone’s built-in tricks
You don’t need a fancy camera to get great shots. Wipe off your lens (it’s probably covered in fingerprints), then tap the screen on your child’s face to set the focus. Burst mode is a lifesaver for wiggly kids, and portrait mode can blur a messy background. Just make sure you’re shooting with the camera app itself and not through a social media app, which can lower the quality.
From Camera Roll to Wall
Once the candy has been sorted and traded (and the parents have taken their “tax”), sit down and pick your favorites. Look for the shots where eyes are sharp and faces are well lit, and don’t be afraid to choose the silly, imperfect ones – those are often the ones you’ll treasure most.
Before you print, use the original photo file rather than a screenshot or a compressed copy sent through a messaging app, since those can look fuzzy when blown up. CANVASDISCOUNT lets you upload straight from your phone and check whether your photo has enough resolution for the size you choose, and backs every order with a lowest-price-in-the-USA guarantee. It’s still worth zooming in on faces and eyes yourself to make sure the shot is in focus.
A single large canvas makes a fun statement piece, while a grouping of smaller prints is a nice way to show off siblings or a few years of costumes side by side.
One tradition to try: take a photo in the same spot every Halloween. Bring out the prints each October alongside the pumpkins and fall decor, and you’ll have a little gallery that shows just how quickly the kids are growing.